Steemjammer e-books are marked down in price for a short period of time! Get your copies now!
Book one: http://amzn.com/B00REKMJ1C
Book two: http://amzn.com/B00SYGJZV2

Steemjammer e-books are marked down in price for a short period of time! Get your copies now!
Book one: http://amzn.com/B00REKMJ1C
Book two: http://amzn.com/B00SYGJZV2
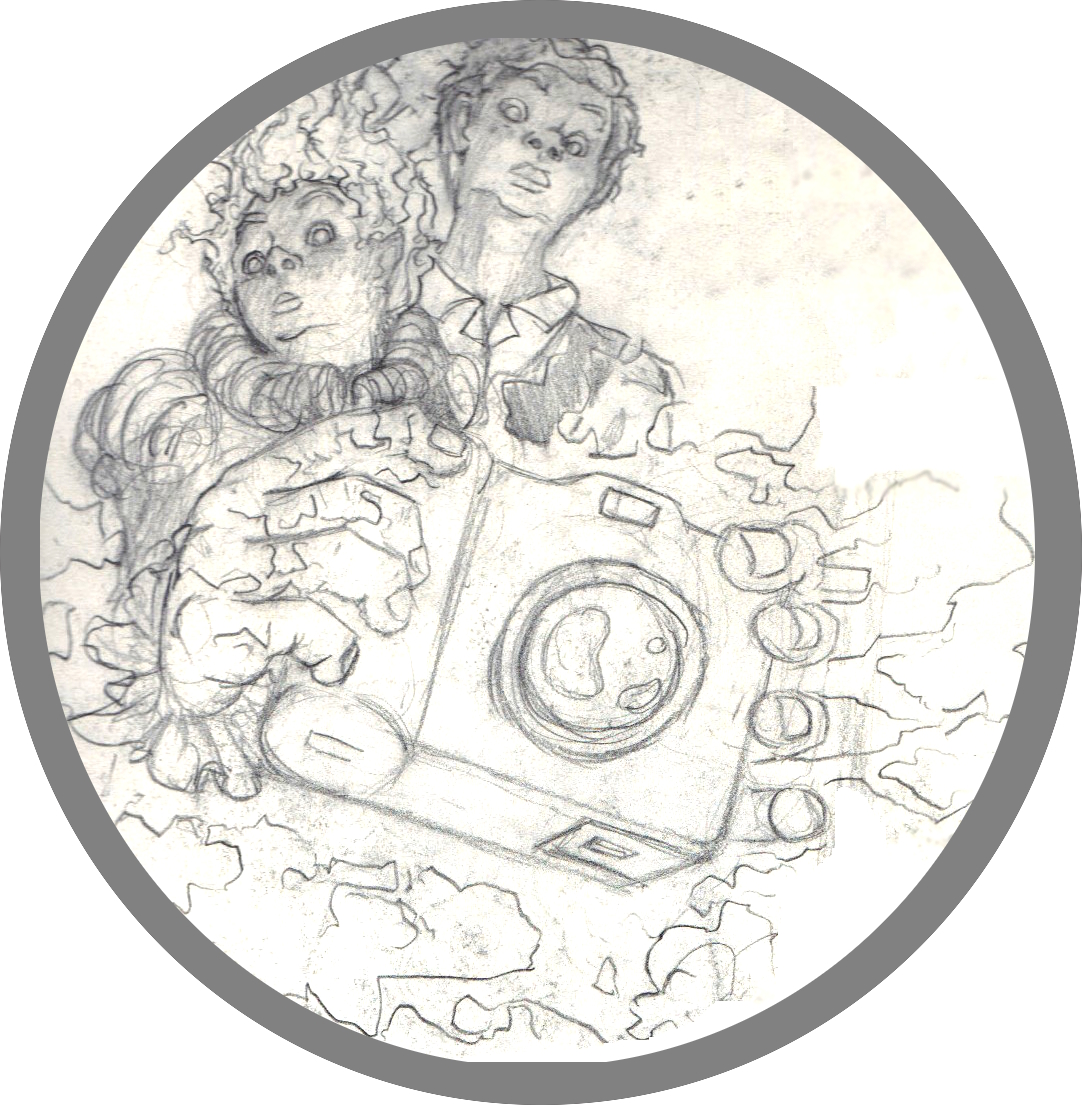
My friend, bestselling author John DeChancie, was kind enough to give a short review of Steemjammer, Through the Verltgaat. I’ve added it to the Amazon.com site:
“A gripping story. Wonderful imagination. Steampunk at its finest.” John DeChancie, author of Castle Perilous, Starrigger, and two Castle Falkenstein books.
Thank you very much, John!
Please check out JohnDeChancie.com or look him up on Facebook. You can also look for his fine books, of which there are many, on Amazon.com and other sites. His Castle Perilous and Starrigger (or Skyways) series are quite good, and a brand new Castle Perilous book has been finished and will be available soon.
On Dec. 27, 2014, I saw that Steemjammer, Through the Verltgaat, had become a “Hot New Release” on Amazon.com! Then, my sister called to tell me it was on a top 100 bestseller list – then two lists (two different steampunk categories). It continued to do very well in Childrens Steampunk, rising all the way to #11 in that bestseller list. Then, it hit number ten! It was so exciting to watch!
Thank you so much to everyone who has bought the book (and also thanks to the people who have helped get it to market)! I hope you enjoy the book, which will be released soon (it’s still in Amazon presage, and the second book in the series will be available soon).
Our ancestors didn’t use the same pasteurized, filtered vinegar that we tend to use today. They used vinegar that had a living and possibly beneficial bacteria culture in it called acetic acid bacteria (it converts ethanol (alcohol) into acetic acid, the sour component of vinegar). Studies suggest that some acetic acid bacteria strains have pro-biotic properties, including possibly helping with some cancers. I’m not sure these claims are widely accepted in the medical community, but I know of no harm caused to people by acetic acid bacteria (save that it can ruin a perfectly good bottle of wine!).
Though it isn’t mentioned in the first book, the Steemjammer family makes their own vinegar, of course. They make it from berries, apples or other fruit they pick in the late summer or fall. In this post, we’re going to discuss red wine vinegar, because it’s probably the easiest one to make. In fact, it’s incredibly simple.
After reading many how-to sites and consulting with a local brew shop (that supports vinegar making and cheese making), I decided on the following method.
You will need:
One bottle of Two-Buck Chuck Cab (Charles Shaw Cab. Sav. red wine, though almost any red wine will do).
One bottle of living culture vinegar. I bought a specialty bottle (12 oz) of red wine vinegar from the brew shop, one that had a living acetic acid bacteria culture in it. You can also buy a mother or mother of vinegar – a really weird looking, skin-like piece of bacteria culture. Or you can hope to capture a wild acetic acid bacteria in your house (I don’t recommend that, however). They say Braggs vinegar, a widely available living culture vinegar, works fine making red wine vinegar.
Bottled or filtered water.
A sterilized funnel.
Clean cheese cloth and a rubber band or string.
A sterilized jar (I use a large pickle jar).
That’s it.
Okay, so Two-Buck-Chuck is not a bad wine for the price and makes good vinegar. If you’re rich and picky, maybe you want to get a BV or similar brand, but I really wouldn’t splurge here. After all, you’re ruining the wine to make vinegar. Why not keep the cost down, especially when Two-Buck-Chuck makes really good vinegar?
In a nutshell, all you do is pour the wine into your jar, shake the living culture vinegar, and add some of it – and let it sit for a few weeks to a few months in a dark, room temperature place with a piece of clean cheesecloth over the top (it needs air).
The main variables – do you dilute it? And how much vinegar to add?
The first time I did this, I used all 12 ounces of the living culture red wine vinegar because my red wine had sulfides in it, and those kill bacteria. In fact, they’re put in wine to stop it from turning into vinegar! So, you have to add enough bacteria to “wear out” the sulfides. I have no idea how much that is, and that’s why I used so much. If I ever figure out a minimum amount to use, I’ll post it.
Because I used so much vinegar, I diluted my batch with a half bottle of clean, filtered water (you don’t want chlorine killing the bacteria, either). I used a rubber band to hold a double-layer of cheesecloth over the jar and put it in a dark shelf over the refrigerator, because it was winter (and that spot stays closer to 70 deg F than other places in my house).
About 2 months later I had a wonderful red wine vinegar. It was really strong, but it had a lively flavor that was far superior to any store bought, processed vinegar I’d ever had. And it was cheap compared to store bought vinegar, too! There were all sorts of things floating in it – pieces of bacteria that form mats or colonies. They look awful but are harmless. You can filter your vinegar through a strainer or coffee paper, and I doubt it gets all the microscopic bacteria – but if you want that, don’t risk a coffee filter. Just pour carefully back and forth until you have a batch that’s mostly free of gunk.
You can reuse this to make more. Also, at some point you need to seal or refrigerate your vinegar to help it last longer. If left unsealed, it will dry up, and it risks getting a nasty bug growing in it.
If you’ve never had fermented vinegar before, I suggest trying a small amount, first – or try some living culture vinegar from the store. You can put a drop on your wrist first and see if you get a reaction. Then, taste a single drop and see if you get a reaction (in both cases wait a day or two). If you worry about this or have a health issue, it would be wise to consult your doctor, first. I know of no health issues from or allergies to vinegar, but you never know – they could exist. There are many sites on homemade vinegar, too, and they detail how to make malt, white wine, apple cider, and champagne vinegar.
This is really easy, and I find it satisfying. If there is a health benefit, that’s great, but I mostly do it for the taste. Good luck!
A couple of years ago, when we started investigating the Maker Movement or DIY Movement, I came across sites that explained how to build an extremely efficient stove out of cans – called a Rocket Stove. My son and I made one out of galvanized steel duct pipe (made for clothes drier exhaust), which was a big mistake for health reasons. The zinc in the galvanized layer doesn’t get hot enough to cook off as a gas if those are used as drier ducts, but if exposed to a hot fire, it could create zinc oxide gas, which causes Welder’s Fever (which can be fatal). Either we didn’t get it hot enough, or because we had it mounted in our fireplace, the bad gas went up and out – and not into us. Anyway, don’t make our mistake – don’t use zinc-treated metal for this. The risk isn’t worth it. Also, please be very careful and use basic fire safety: if you’re a child, please get a responsible adult’s permission and help before trying anything like this. I also recommend reading many other sites on rocket stoves and safety, and take a class from a maker club in your area if you have no experience with this – a class that includes safety training.
So, what is a rocket stove, and what’s the big deal about it?
Well, the sites I read explained that in the developing world it’s common for people to cook in their homes using the three rock method, i.e. they build a campfire on a hearth in their house (often with no chimney!) and use three rocks to hold up their cooking pot over the flames. This kind of open fire is very inefficient and requires actual firewood (like split wood from a tree trunk – or decent sized branch wood) – which means that people all over the world are destroying their forests just to cook dinner. It also means their houses are filled with dangerous smoke, giving them all sorts of health issues.
A solution is to change how they cook, and a great option is the rocket stove. It’s also a great thing to make (please be safe!) and have ready in case of an emergency (like the power is off for a long time and you need to cook). Rocket stoves only require dry trash wood, sticks, stems, cardboard or even heavy grass to work. You don’t need to kill a tree to cook on a rocket stove: the sticks that fall off trees are enough. Also, because rocket stoves actually concentrate and burn the smoke in the riser, there’s very little smoke – so they pollute little and cause fewer health problems. I wouldn’t use one indoors, but in the developing world, if a family is already using three-rock fires indoors, a rocket stove would make a heck of a lot less indoor pollution.
Here’s a diagram:
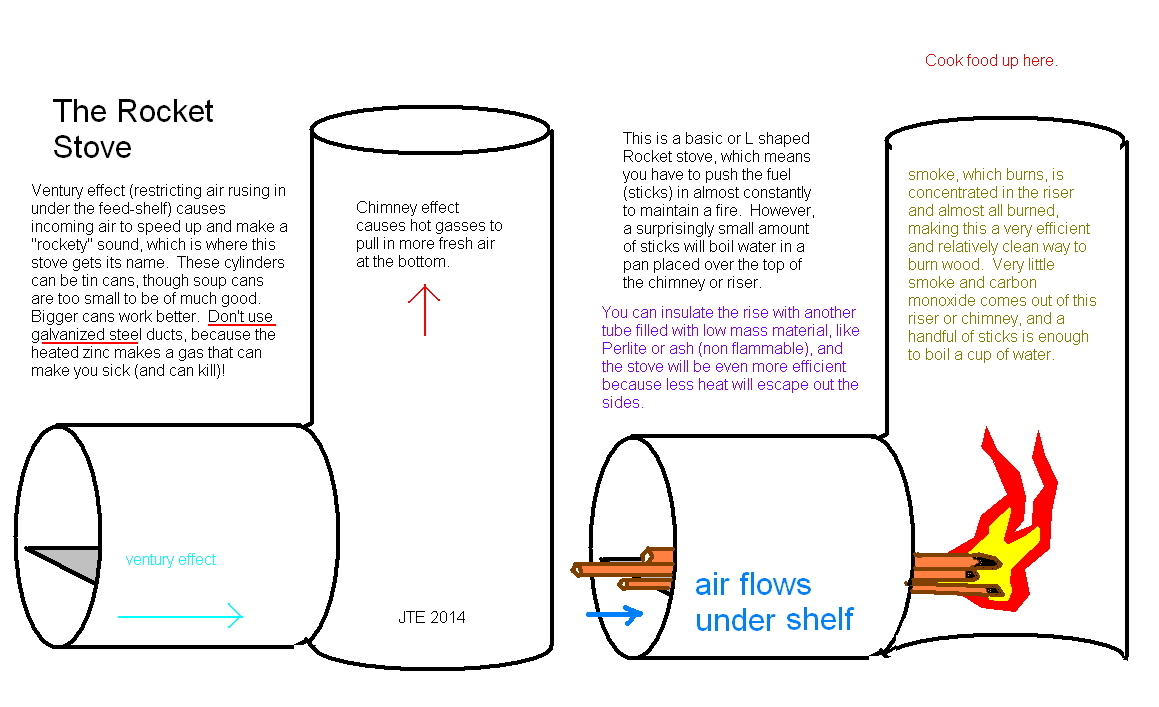
This is a basic L-shaped Rocket Stove. The sticks are fed in on top of the shelf, and while some air flows in with the sticks, the important air for the fire rushes in under the shelf. The hot gasses going up in the riser (chimney effect) causes the air to rush in, and because the space is restricted, the air speeds up (ventury effect) – making a rockety sound (which is why it’s called a rocket stove). You can add a slightly larger metal cylinder around the riser and fill the gap with a non flammable, low density insulating material, like Perlite or ash. This makes the stove burn more efficiently, because less heat escapes out the sides of the risers – and goes up to your cooking pot (which has to be positioned at least a few inches above the top of the riser).
Our first rocket stove worked. In about five minutes and using only a handful of sticks from the yard, my son and I got a corn can with 9 or 10 ounces of water in it to reach a hard boil. I was amazed. And it made the sound of a rocket engine, which was very gaaf (cool)!
Since then, we’ve experimented with gravity-fed rocket stoves, also called J style. It’s hard to keep the fire from burning up the fuel, even when you use a sealed (or is it sealed?) feed tube, to try to keep oxygen out of the feed tube. We’ve also experimented with TLUD stoves or Top-Lit Up-Draft – where you basically gassify trash-wood or wood pellets for a quality, relatively clean burning flame. It’s been challenging for us to get those to burn long enough to boil large amounts of water (a gallon or more), but we can bring 2 cups or a quart to a boil in 5 to 10 minutes. Another problem these stoves have is that they generally have one temperature: blazing hot. So it’s hard to simmer or do other low heat cooking, except there’s got to be a way to shunt off part of the heat for this purpose. We’re still working on this.
There are commercially made rocket stoves, if you want to buy one and try it out. There are also commercially made TLUD and TLUD like stoves, if making one seems like a bad idea for you. I’d encourage you to look into making one, but again, please be sure that you have the necessary skills and understanding of safety before trying this. You’re responsible for the safety of you and the people around you when you work with metal (which can have sharp edges or give off toxic gasses), and any time you work with fire, there’s a danger.
In the novel, Steemjammer, we meet people who live in a world of steam that has developed into a world kind of like ours – but it’s also one without a central government or much sense of safety. The advantage of this is that people are free to do what they want, and society benefits from increased innovation and entrepreneurship. The downside is that they have a lot more accidents, including accidental deaths, that could have been avoided. Like generations past in our world, the members of this steam society are tough and just consider risk (and accidents) a part of life. If you never met a person born before 1900, you might have trouble believing that our older generations didn’t care much about safety (compared to our hyper-safety levels – they did care some), but it’s true (if you talk to enough construction workers, for instance, you’ll come across this attitude, even today). Personally, I’d learn as much as I could about safety before undertaking any project involving metal work or fire. If you do it right, it’s possible to keep accidents down to the level of minor cuts and bruises – while learning how to do amazing things, like boiling water with a handful of sticks (something you could never do arranging these sticks in the style of a campfire, for instance). Good luck and please be safe!
(Also, if you’re interested in steam engines or boilers, please don’t make one unless you really, REALLY know what you’re doing. They say a gallon of water in a steam boiler can have as much energy as one stick of dynamite. In the steam era, many people died from steam boiler explosions. They’re incredibly dangerous, even if you are trained to use or make them. I’m sorry to sound paranoid, but when it comes to steam power, you can’t be careful enough.)
In the first Steemjammer book, chickens are an important part of the family’s life. The Steemjammers are very independent and make and grow everything they need in their large yard and workshop-like house (except for a few things). Because it’s a novel, we only learn about the chickens briefly, but my family and I have been keeping chickens in our backyard for several years now. And I’d like to share a little of that experience with you.
A few years ago, my wife found out it was legal to keep backyard chickens in our city. She also found out that it was easy to make your own incubator and that fertile eggs from Trader Joes (and other stores) could be hatched! Really? I had to see this, so we got to work on the project – well, my wife mostly did. We learned a lot from a site called BackYardChickens.com, which I recommend, and we converted a Styrofoam ice chest into an incubator.
It had a cheap computer fan from an electronics store, a light socket for a 40w (small) bulb (incandescent – the kind that throw off heat – hard to find now), a dish for water and sponges (humidity), and a cheap water heater thermostat from a large hardware store. The thermostat normally had a wide range, over 4 degrees, so we had to have the distance from the bulb just right, which had the effect of narrowing its upper and lower range to about 2 degrees. We had the temp going from around 99 deg F to 101 deg F – or thereabouts. Many factors messed with this, and we panicked when it got too low or too high – but it was never too low or too high too long, as some of the eggs were viable and kept developing.
The eggs were in a carton, and we had to reach in at least 3 times a day to turn or move them (this keeps chicks from sticking to the shells). My wife candled the eggs (a halogen flashlight in a dark room) and found that about six of the dozen we’d started with were duds. We’d find later that they probably had bad air sacs. They were also a little old (9 days old). Fertilized eggs at TJ have a 3-digit code on them indicating the day they were laid, but it’s in the Julian calendar – Google how to make sense of this (it’s a long explanation). Anyway, eggs under 10 or 11 days old that have been in a cold case at 39 deg F will hatch – or some will. This is because chickens lay eggs over days, which can be very cold in the spring, and then one goes broody and sits on them. The warmth at that point activates the eggs, and chilled eggs can hatch. But some TJ eggs have loose air sacs, which you can see with a strong light (candling), and I think six of our eggs probably had bad air sacs (or weren’t fertile) and were duds. We threw them out.
About 20 days in we went into lockdown, where the eggs are taken from the carton and put on paper towels and not turned. At day 21, iirc, they began hatching. One chick didn’t make it, but five chicks hatched and went into the brooder!
These TJ chicks, from large white fertile eggs, were yellow and adorable – and would grow up to be white Leghorns. We had them in a cardboard box on textured paper (if slick, they can damage their feet permanently). We had a light and a thermometer so there was a spot where they were 95 deg F or so, with room to get away from the heat. We made sure no vents aimed at them. Their little water dish had marbles in it, so they couldn’t get in it or drown. And we bought some starter mash (feed for chicks) from a feed store. They ate, drank and grew. Sadly, at 4 to 6 weeks, three of them turned out to be cockerels (males). One rooster might be allowed in our area, but they’re way too loud. I ran a Craigslist ad and gave them a man who had some no-name chickens in his yard that he wanted to breed into better egg-layers, and Leghorns are among the best at that. Our remaining hens, or pullets (young hens), were named Henny Penny and Flutters. My wife made a plywood and tar paper coop for them, plus a chicken wire run.
Leghorns lay maybe 250 eggs a year each (about 5 a week per bird), once they get going. It seemed to take forever for them to start laying, but they were actually fast (at about five months). Meanwhile, while they were growing up, my wife turned an old plastic cooler into a better incubator, with several fans and a new thermostat (that wasn’t so touchy and kept the heat in the correct range better). She used a dowel rod so we could turn the egg tray or rock it – to one side for part of the day – then to the other side – then back to the other side. Not opening it to turn the eggs helped keep the temperature steady. Also, I suggested we candle the eggs in Trader Joe’s this time before buying them. My wife said, “No way! I’m not going to look like an idiot doing that in a store!” But I argued how else are we going to get 12 good eggs with tight air sacs for our next batch. So, we looked like idiots and traded eggs from several cartons until we got 12 good ones.
This time, eight hatched. Six turned out to be boys, ugh. Gave them away to a group that locates animals, and these new girls were named Lily Lilac and Blue, after their leg tags. At that point we stopped hatching Trader Joe eggs and got into other breeds. Chickens don’t live very long (five years, sometimes longer), and we’ve already lost one of them. She got sick or was bitten by a black widow – we’re not sure. We took her inside and did what we could for her – we had some antibiotics for her – but it didn’t help, and we lost her. So, given that we’re not sure how much longer our original 3 birds will last, we’ve started with some more eggs from TJs. Two are being hatched (we hope) by a very small chicken called a Serama. The others we thought would be hatched by Lily, who’d seemed to go broody, but she didn’t sit on them. So, into the incubator they went – and we’ll see what happens.
This was a great experience for our family. The children help out with feeding and cleaning, and we know where our eggs come from now. Our eggs have thick whites and, when there are greens to feed the chickens, dark orange yolks (that are rich). Eggs from chickens that forage are lower in cholesterol and higher in good Omega oils (and are more nutritious). They taste better than store eggs, too. If you’re allowed to have chickens in your yard, I strongly recommend giving it a try. It’s not easy, but there are great sites like backyardchickens.com to advise you. It’s also not that hard, either, once you get them established. You check and feed them twice a day – and the mess doesn’t have to be cleaned all that often if you have the right system. Give it a try! Oh, the eggs in Steemjammer are many colors – some dark, chocolate brown – some green or blue. Egg shells range from white to tinted to brown to very dark brown (I think Barnevelders, an old Dutch breed, lay these) to green or blue (Aruacana or Easter Egger chickens). So far, ours lay white or tinted eggs – some tiny – some medium – some very large. I want to try dark brown and blue/green one day, though. The shell’s color doesn’t affect the egg’s taste, or so I’ve been told. Anyway, I wish you the best of luck, if you try this. I think you’ll enjoy it. We find it satisfying and fun (chickens are fun to watch, strangely – and they beat the heck out of 90% of what’s on TV!). John
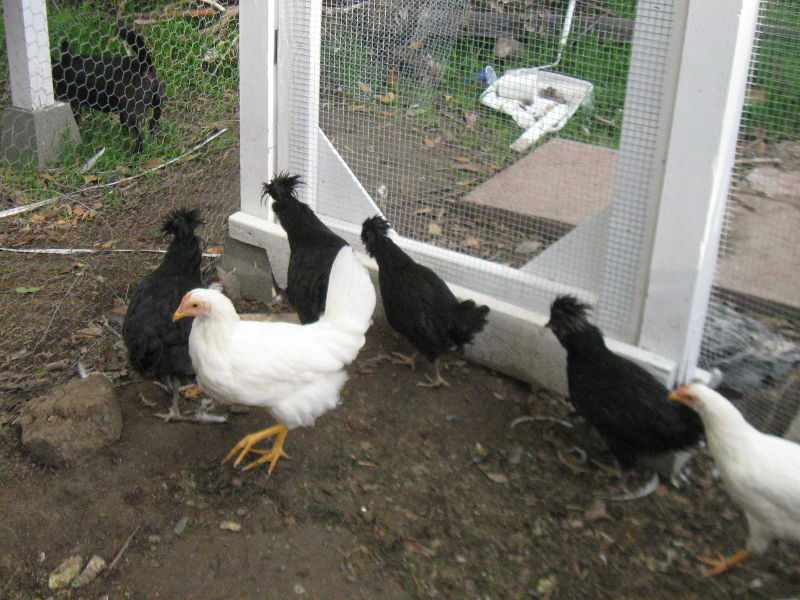
Below are some photos.
The white hens are the Leghorns hatched from Trader Joes fertile eggs. The black ones are Crevecoeurs, an endangered breed from France. And that’s Jack, our dog, outside the run. The chickens ate all the grass in their run, so we have to let them out to forage or pick greens to give them.
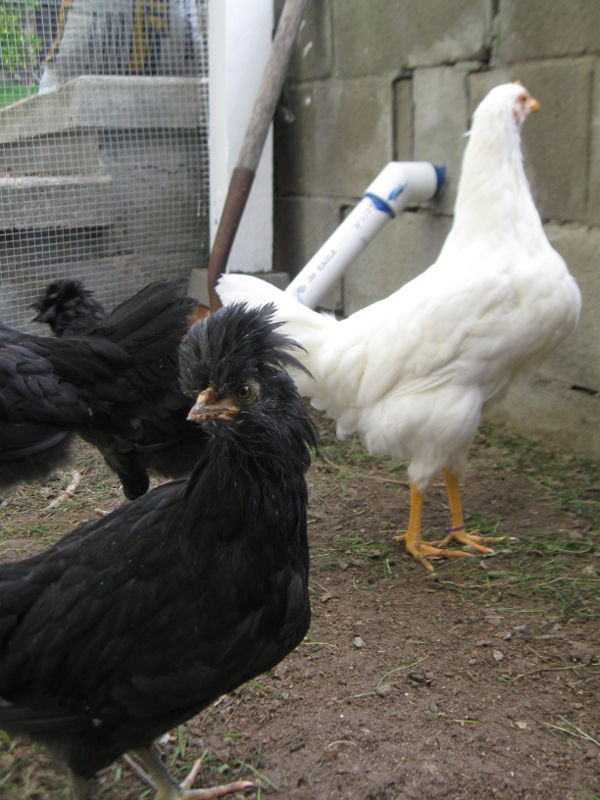
This Leghorn has been eating and has a full crop – the lump on her chest. It’s just a crop full of food.
Hi Everyone!
We just added Google’s Feedburner service to our blog site. Since we are getting ready to publish Steemjammer soon, we want to make sure everyone who wants updates on what is happening with the Steemjammer series can get that information automatically! We hope you will sign up and stay in touch! Thank you so much for your support!
Sincerely, Ingrid Eubank